


Packaging Advice
The right packaging is essential to avoid damaging a piece of art during transport, and also helps to make a good impression when a client takes delivery. Here we provide detailed step-by-step guides for packaging two-dimensional (wall) art.
Flat or rolled packaging?
The first thing to decide when shipping wall art is whether to transport the artwork flat (e.g. a stretched canvas) or rolled. Rolling an artwork for transport involves shipping in a tube, and has some important advantages. Risk of damage is reduced by presenting a smaller surface area for transport, and can be further mitigated by selecting a strong cylinder for the outer packaging. A smaller surface area also means that courier charges are usually substantively lower for rolled artwork. Furthermore, if the artwork does not need to be un-mounted prior to packaging, then the steps involved are generally less complicated with rolled work.
There are, however, important limitations associated with rolling an artwork for transport. Rolling is impossible for any artwork with a rigid support, and is complicated if the artwork would need to be un-mounted before being rolled. Rolling is also generally more physically demanding on an artwork, and is only an option, for example, if paint is absolutely dry – touch / surface dry is not remotely sufficient. Furthermore, (re)mounting an artwork following delivery also introduces risks, and while these risks will generally be born after a purchase is complete, no one wants to leave a dissatisfied client holding damaged work.
Most pieces of artwork that Artifuse ships are flat packaged. We consequently describe flat packaging first, after which we discuss rolling an artwork for transport.
Flat-packaging for transport
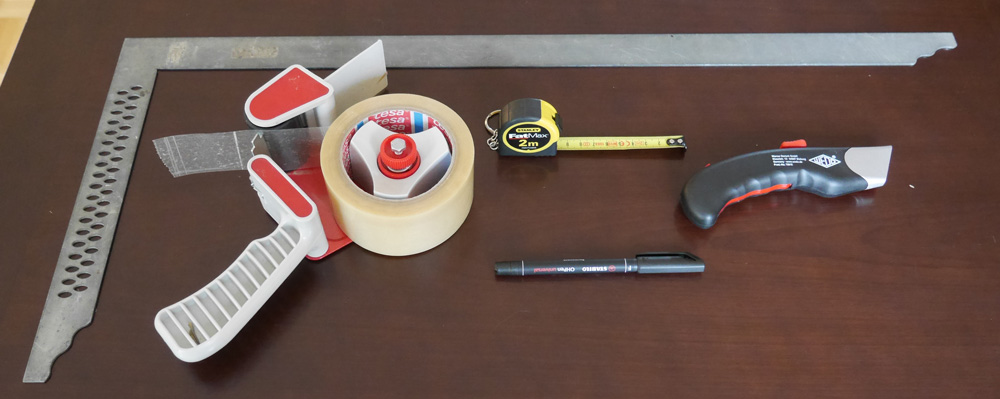
Tools
Just a few tools are required to flat-pack an artwork for transport, all of which are likely to be found in your local hardware store. While most of these tools are fairly common, you should pay special attention to the details of some.
Box cutter
The box cutter is the principal tool for flat-packaging artwork. It is consequently important to find a good one and replace the blades regularly (once every five packages at most).
Marker
Although you could use a pencil to set out guide lines, we prefer the greater clarity that a marker provides.
Set-square
Used to trace square angles from an arbitrary box edge, this tool (or alternatively a T-square) is useful for resizing boxes. Make sure that you find a metallic set-square so that it can be used with both the marker and the box cutter.
Tape gun
Find a tape gun that allows you to adjust resistance of the roller (e.g. using a nob on the roller's axle).
Tape measure
A standard retractable metallic tape measure is perfect.
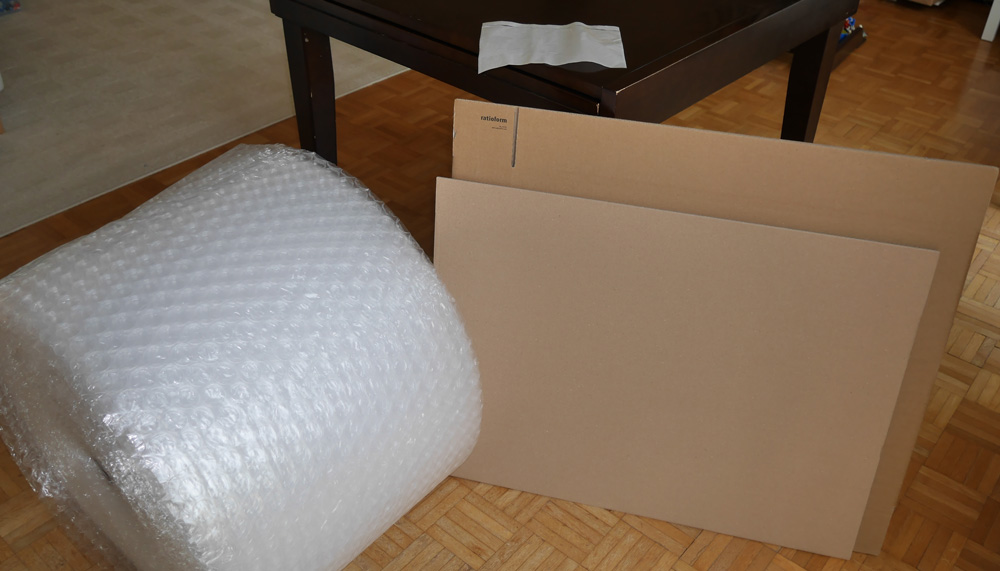
Materials
Safe delivery of a flat-packaged artwork depends upon the quality of the packaging materials used. The difficulty associated with sourcing these materials can vary substantially between countries. In our experience, you will know you have found a decent provider when they stock all of the items on the list that follows. For reference, we typically source our packaging material from Ratioform in Switzerland. Working from the inside-out, the following materials are useful for flat-packaging artwork.
Plastic film
Plastic film provides an inner-lining for the artwork, protecting its surface from rubbing and abrasion. We use film that is 50cm wide and designed for pallet wrapping, which could be substituted by standard kitchen wrap.
Rigid cardboard pads
Rigid corrugated cardboard pads (feuilles carton ondule), commonly used to stabilise pallets, are useful to create an inner box for an artwork. This is important, as most transport insurance policies (including the one we use) require flat-packaged artwork to be double boxed. Obtain the largest size that you can, which will give you maximum flexibility when boxing an artwork – we typically use 1170x970 cm pads. In most cases single layer corrugation will be sufficient, but consider double-layer if you have a particularly large piece.
Bubble wrap
We use bubble wrap rolls, with large bubbles, which are 50cm wide and perforated every 40cm.
Boxes
We currently ship paintings using three main box sizes: small 67x13x69cm; medium 67x13x96cm; and large 100x16x90-160cm. The largest of these boxes is telescoping, and the three together provide a decent starting point for packaging most artwork.
Packing tape
We use transparent packing tape that is 5cm wide. Note when purchasing tape that higher quality (price) products tend to be easier to cut, easier to apply, and provide greater adhesion – this is not something that you should try to economise on.
Plastic sleeve
A plastic sleeve is needed to attach the shipping documentation to the outside of the packaged piece.
Method
The best way to protect a piece of art in transport, like staying warm in the snow, is to use multiple layers. We use four key layers of packaging: an inner skin, an inner box, bubble wrap, and an outer box. Each of these layers is described in turn.
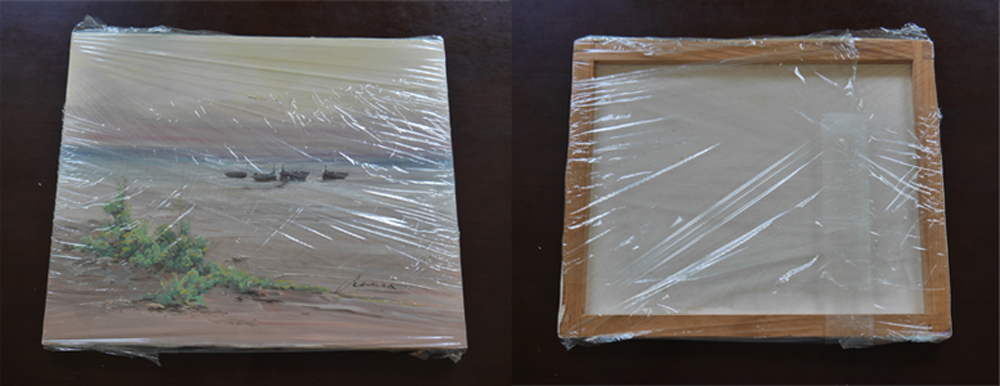
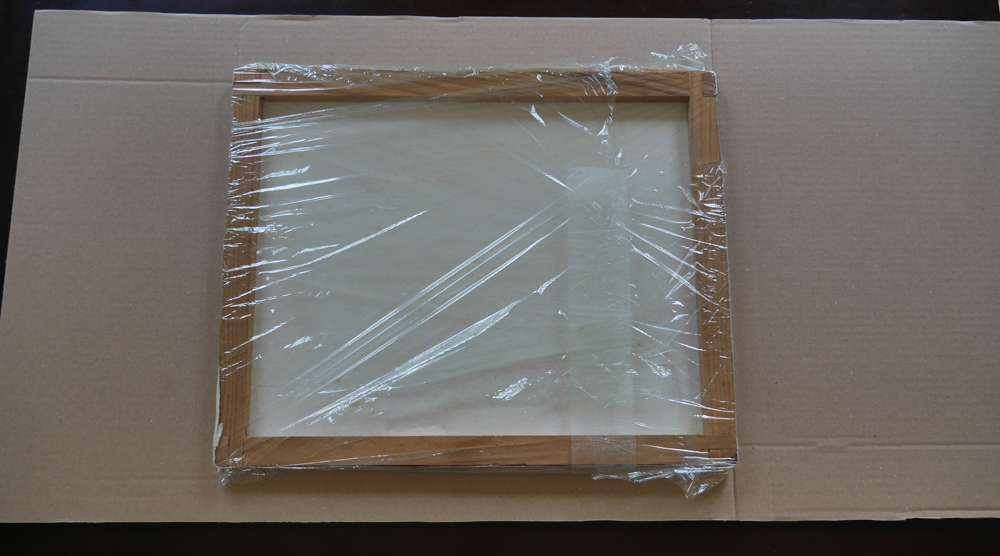
Inner skin
The inner-most packing layer is a skin of plastic film (pallet wrap). This skin helps to protect the surface of an artwork from rubbing and scratches during transport. To ensure that this layer is effective, it is important that the skin itself does not rub or slip on the surface of the artwork. This is achieved by keeping the wrap tight and straight on the front-facing surface. A useful tip is to start wrapping from the back of a piece, so that joins in the wrapping are away from the front-facing surface (in the cavity left by the stretching frame).
Inner box
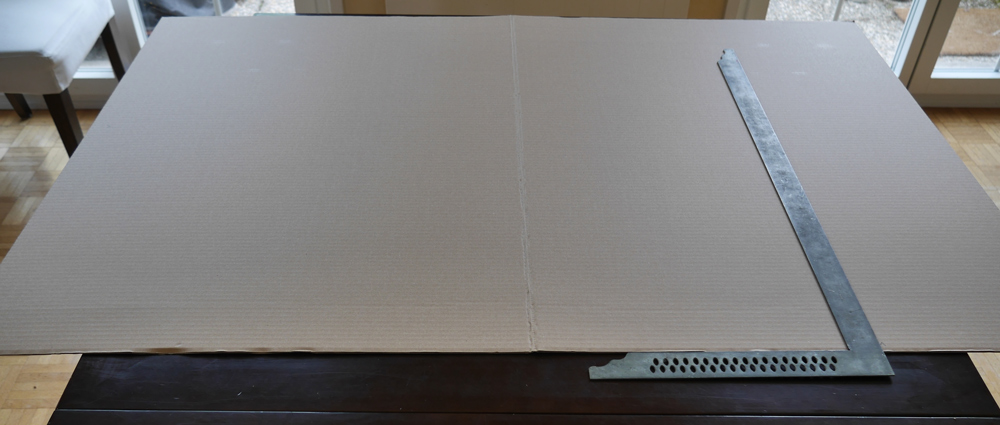
Our partner couriers require each artwork to be double-boxed for transport as part of our transport insurance. We construct an inner box for each artwork using rigid cardboard pads. What we are aiming for is an inner box, which is folded square along two sides in one dimension (e.g. the height of the artwork), and is pinched along the two sides of the other dimension (e.g. the width of the artwork). How to proceed depends upon the size of the artwork relative to your cardboard pads.
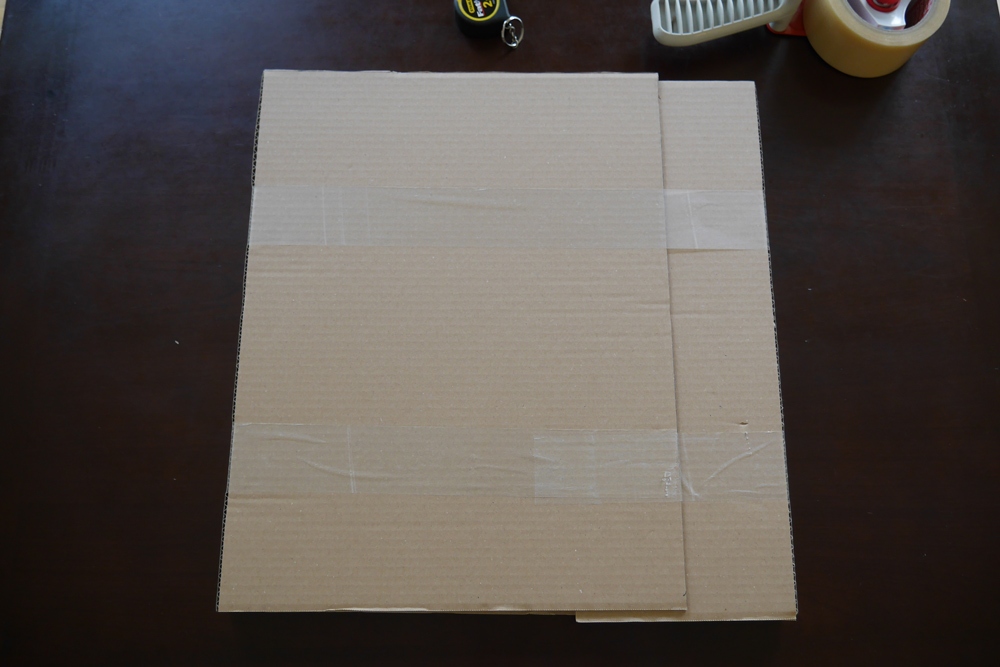
Start by sizing the cardboard panels using the T-square. In the simplest case, it will be possible to cut a rectangle from a single cardboard pad, with one dimension equal to two times the length of one of the sides of your artwork (e.g. width), plus two times its depth, plus a margin of approximately 10cm. The length of the other dimension of the cardboard rectangle should be sized to the length of the other side of your artwork (e.g. height) plus 10cm. The first of these dimensions will be folded around your piece, and the second will be closed by pinching ends together. Ideally it will be possible to fold along the grain of the cardboard corrugation. If that is not possible, then you will need to score the folds to obtain clean corners for the inner box.
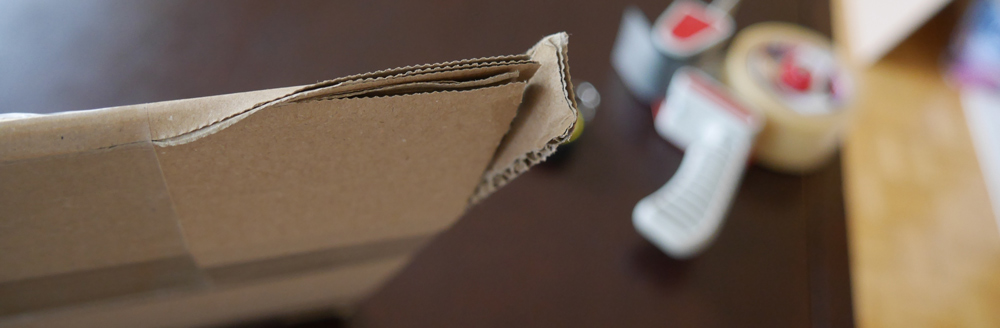
Having cut the cardboard to size, lay it on a flat surface, and place your artwork face down in the middle, ensuring that the cardboard extends about 5cm beyond either side of your artwork along one dimension (e.g. height). Fold the ends that extend well beyond either side of your artwork and tape them down where they meet in the middle. The inner box is completed by pinching the remaining open sides together to form a triangle on either end, and taping them shut.
Using the tape gun effectively can take a bit of practice, and the preferred approach differs from person to person. In general, we find the following approach works well. First, increase the tension control of the tape gun as high as is comfortable. This helps to control the length of tape used at any one place. To start taping, extend a bit of tape and position it with your free hand. It is often easiest to extend sufficient tape to pass over the first corner. From there, use the tape gun to play out as much tape as you need. Place the gun end of the tape with care, and use a twisting motion to cut the tape. This process is easiest with high quality tape, which tends to tear less and adhere better than cheaper variants.
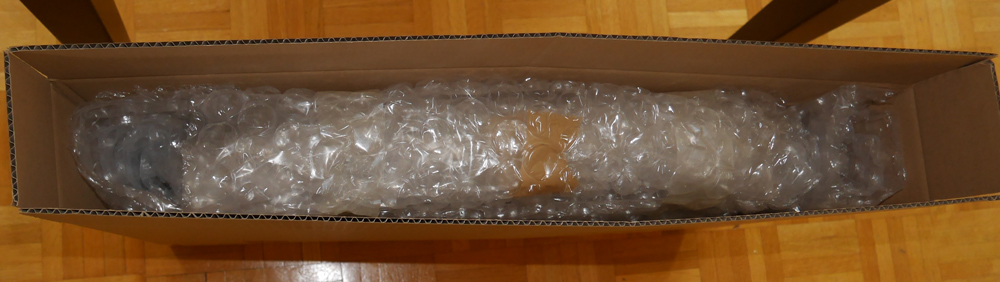
Bubble wrap
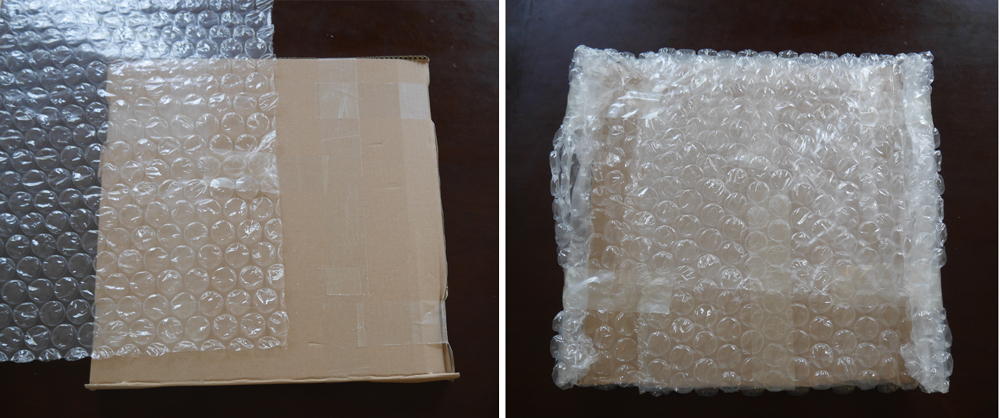
We typically use a single layer of bubble wrap to cover the entire inner box, with a double layer of wrap along two of its sides. As described above, the inner box is completed by pinching ends to form a triangle along two sides. The triangular forms are useful because they provide shock absorption. The folded sides of the inner box are not similarly protected, and it is consequently here that we provide additional protection using bubble wrap.
Start by taping the free end of the bubble wrap square to the inner box, so that its side extends about 10cm beyond the box and its end will wrap around a side that has been pinched to a triangle. Keeping the bubble wrap tight, wrap entirely around the box, cut and tape down to create a single layer. Depending upon the size of your piece, you may need multiple passes to cover the full surface. This should give you a fully covered piece with two open ends, similar to what you had with the inner box, but this time with the open ends of the bubble wrap along the folded ends of the inner box. You can then use the 10cm extension of bubble wrap on either side of the inner box to provide a double layer of padding by taping this down.
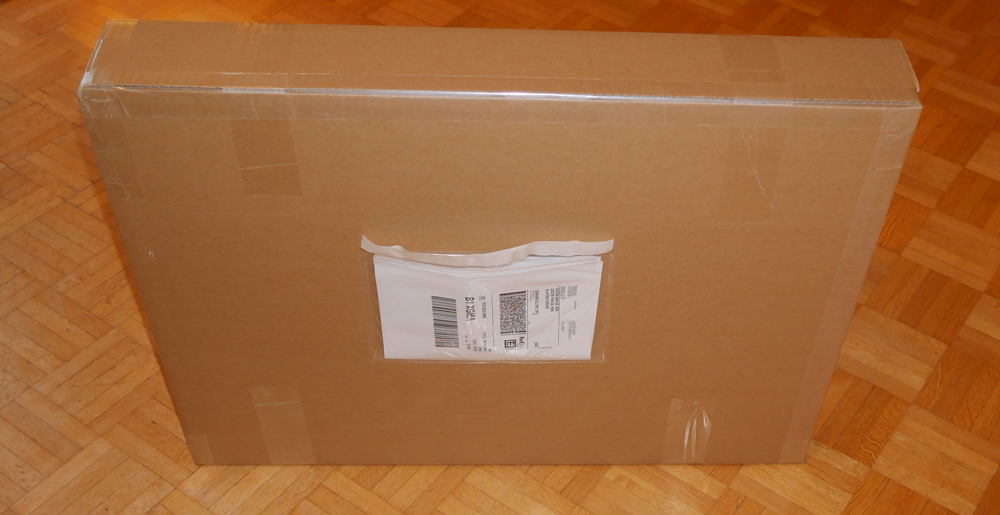
Outer box
The most common source of damage to the edges of an artwork during transport is sliding about inside the outer box. With luck, your bubble wrapped artwork will fit snugly into a pre-fabricated outer box. If it does not, then the best option is usually to fill any excess space with bubble wrap. Do not use any type of granular filler (e.g. foam balls), which can shift during transport and expose your work to damage.
Once you are happy that your artwork is snugly packaged inside its outer box, you can close the box and tape it shut. We typically tape all exposed seams of the outer box.
Rolling an artwork for transport
This guide focusses on the steps involved in rolling an artwork for transport – mounting and un-mounting an artwork are not discussed here.
Tools
Scissors or box cutter
Used to size bubble wrap and archival paper.
Materials
Archival paper
Archival paper (e.g. glassine) is specifically designed to avoid releasing chemicals when in contact with another surface, and so is ideal to act as a buffer when rolling artwork for transport.
Artist tape
Used for securing the inner roll of the packaging.
Bubble wrap
For rolled shipping, we use bubble wrap with small bubbles, 120cm wide and perforated every 40cm.
Packing tube
A cardboard or plastic packing tube approximately 15cm longer than the shortest side of your artwork and at least 15cm in diameter. The packing tube should be supplied with end caps.
Packing tape
We use transparent packing tape that is 5cm wide. Note when purchasing tape that higher quality variants tend to be easier to cut, easier to apply, and provide greater adhesion – this is not something that you should try to economise on.
Plastic sleeve
A plastic sleeve is needed to attach the shipping documentation.
Method
We use three key layers to protect artwork when rolled for transport: an inner-layer of archival paper to protect the surface of the work; a middle-layer of bubble wrap to avoid slipping and abrasion of the work; and an outer-tubing to shield the work from damage. Application of each of these layers is discussed in turn.
Inner-layer of archival paper
Begin by laying out a surface of archival paper that is approximately 5cm larger than your artwork on all sides. Depending on the size of your artwork, this may involve combining multiple sheets of archival paper. If multiple sheets of paper are used, then you should overlap adjacent sheets by around 4cm.
The purpose of the archival paper is to provide a protective cover to the surface of your piece. With your archival paper in place, it is time to lay out your artwork. Paintings should always be placed face-down on the archival paper for rolling. This will avoid compressing the surface of the paint when the artwork is rolled – any cracking caused by putting the surface of a painting in tension when rolled will be remedied (in part) when the artwork is unrolled following delivery. In the case of artworks on paper, including drawings and watercolours, the decision to place the work face-down or face-up is more ambiguous. We typically place these face-up for rolling.
Starting from one of the short ends of the artwork, begin rolling with a soft arch. The appropriate tension for rolling an artwork is inevitably a judgement call – too tight and you risk folding the artwork, too loose and the artwork will move in transit risking abrasion to its surface. If you see any bends or folds inside the roll, then you should release the tension and roll less tightly. When you get to the end of the roll, tape it shut with artist or drafting tape.
Middle-layer of bubble wrap
As with the inner layer, begin by setting out the bubble wrap on a flat surface, with the bubbles facing down. Place your inner roll on top of the bubble wrap, so that the top of your inner roll is approximately 5cm inside the edge of the bubble wrap on either side. Begin rolling with layers of bubble wrap until the diameter is approximately the same as the inside of your transport tube. Cut the bubble wrap, and tape the long-edge closed using packaging tape. Finally, tape off the 5cm excess bubble wrap on each end of the roll to provide some shock absorption.
Outer-layer tubing
Slide your roll into the outer tubing, which should fit snugly. If there is any excess space inside the tubing, use additional bubble wrap to fill it. If you find it difficult to slide your roll into the outer tubing, then you should obtain a larger tube. Once inserted, place the caps on the outer tube and seal the caps with packing tape. We applying packing tape over the top of each cap in a star-shaped pattern, followed by a ring of tape below each caps to hold the ends of each star in place.